Now I had something to bolt them to, the steering column switches could be fitted and wired in. The Sierra's switch connecting plugs, and about 6" of wire, are connected to Quantum's loom, using the supplied large multi plugs and their internal crimp-on connectors. Thankfully, the manual covers this task in great detail, giving the connector pin layouts and functions for the various types of switches that Ford have used for the Sierra. This meant that it was simply a case of matching the connector pin number to the appropriate colour wire in the Xtreme Loom. Having carefully made all the connections, I temporarily fitted the battery to test the various circuits. Nearly everything worked - the exceptions being the nearside front indicator and the nearside repeater lamp, although there was power to the nearside rear indicator. An investigation with a test probe revealed the culprit to be the wiring at the nearside repeater connector. One of the wires in the loom - the feed from the indicator switch - was too short to poke out of the end of the rubber protective sleeve and had not been crimped, although the parallel circuit connecting wire was there. By undoing the fuse box and relays, I was able to move the loom to a position where I could crimp on another connector, this time containing both wires. It was a good thing that I had not firmly secured the loom earlier!
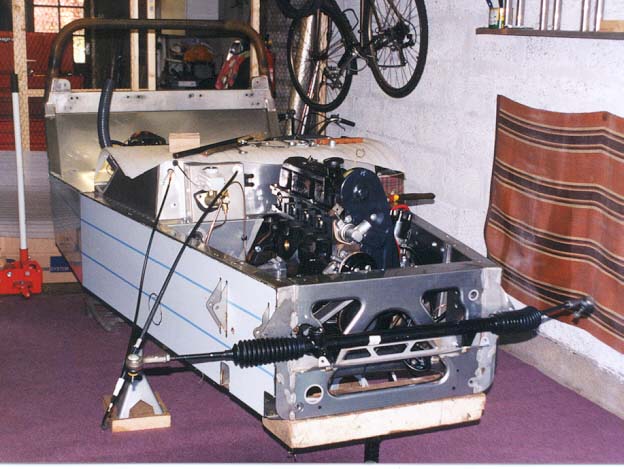
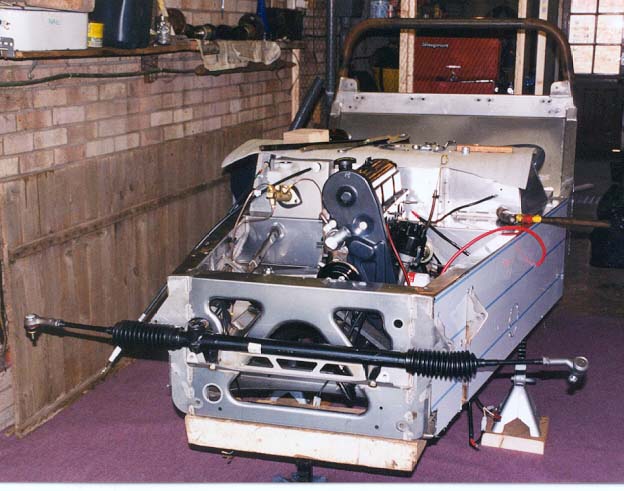
After all the small, fiddly stuff, I was looking forward to getting something substantial into the chassis. I already had the rebuilt engine and 'box bolted together, so with the help of Rod and his wife Dee, we carefully hoisted the unit into place. The only tricky part was holding the engine at quite a steep angle, so that the rear of the gearbox could enter the tunnel, while the engine sump cleared the front bulkhead. We also had a bit of a struggle getting the long threaded studs on the top of the engine insulators into the holes in the alloy engine mounts. With a bit of persuasion from a hammer and block of wood, the engine finally dropped into place. With hindsight, it probably would have been easier to re-arrange the lifting shackles and straps, to make tilting the engine easier. I'd also bolt the engine insulators to the engine mountings, to allow the shorter studs at the bottom of the insulators to drop into the slots in the engine mounting brackets on the chassis. We'll know next time!
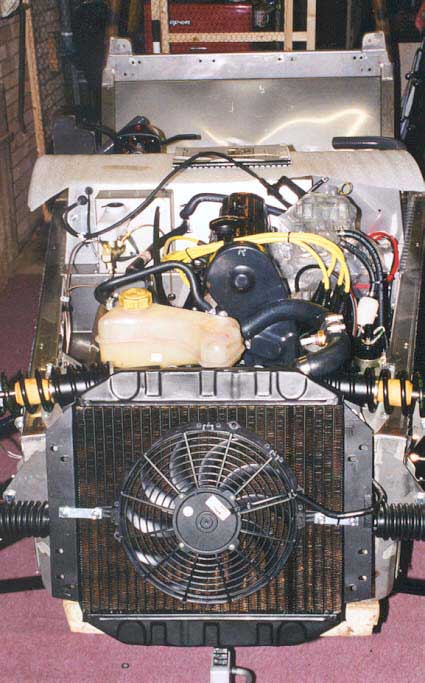
Fitting the radiator, cooling fan and expansion tank was easy enough, but the hoses needed a bit of thought. The Xtreme uses the hoses from the donor car, except for a new top hose, which is cut in half to take a short metal pipe that holds the cooling fan thermo switch. The original bottom hose is also cut to accept a longer pipe, which has a spigot for the lower hose from the expansion tank. These took a bit of fiddling with, in order to get all the hoses and pipes neatly into place, without fouling the chassis or alternator belt. Eventually I managed it, although access to some of the lower hose clips was rather awkward. When I tested the fan and thermo switch, the fan ran backwards. This was easily remedied by swapping over the two terminals in the fan's connector block.
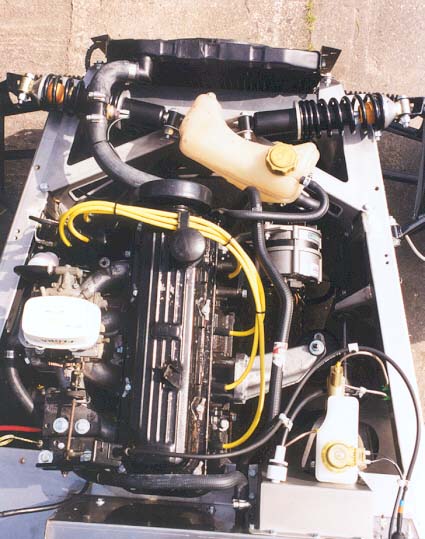
The engine's ancillaries were no problem, as they were mostly new or reconditioned standard Sierra items. The only exceptions were a new Weber 32/34DMTL manual choke carburettor and a reconditioned Ford Cortina 2.0S distributor. For simplicity and reliability, I chose not to use the Sierra's original electronic distributor and ECU, replacing them with a points-type distributor and a standard 12V ignition coil. I set the ignition timing statically to 8 degrees BTDC using a multi meter and as I don't yet have an exhaust system, the engine bay is finished for now. (Yes, I know the cam cover is rather grotty, I'll be having it refurbished soon!).